This past week, we received an email from someone that wanted to know where we purchased our life-sized cacao trees that are in our boutique. Many people have asked about them and I am always tickled to share my trees’ story.
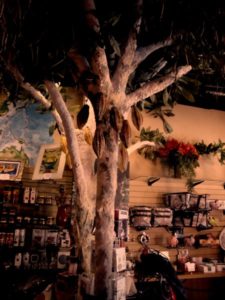
I made the cacao trees that grow at 805 Pearl Street! You see, one of the interesting and somewhat challenging things that come up when you seek to lease out a space are the “bones” of existing architecture that you must adopt. Having been a graphic artist and sign builder in my former life, one of my biggest revelations was when I acknowledged how when parameters were placed on a project I was working on, the more creative I became… My cacao tress are an excellent example of just that.
My “trees” are actually support posts to beams in my “chocolate” ceiling. Although, I inherited the space from Bayleaf (now at 1222 Pearl), rumor has it that my space was once the very memorable Time Out Hot Tubs and, at that time, there were many hot tubs on the roof requiring extra support posts in the main space. I won’t go into too much detail, but many of our guests have blushed as they remembered their experiences at Time Out HT, mmmmm…? My broker had admitted to working as a server there. All of this is a very different story, indeed!
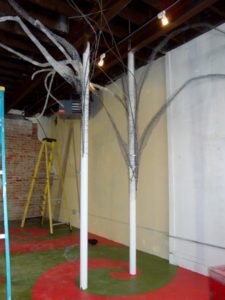
Suffice to say, we were able to remove several of the posts, but our mechanical engineer insisted that two needed to remain.
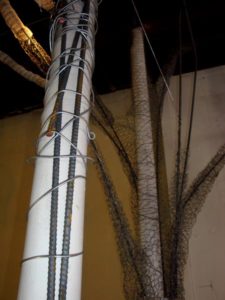
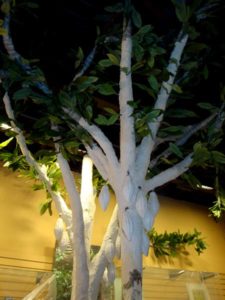
These two posts were not far from the wall or each other and created a rather tight space. So, I embraced this opportunity and with a little chicken wire, rebar and papier-mâché, I created our cacao trees.
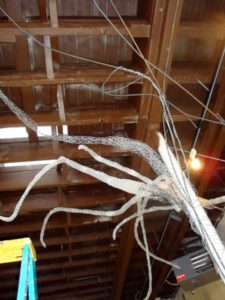
I bent and twisted fifteen 10 foot pieces of rebar and attached them to the posts at irregular intervals with self-tapping screws, rebar twist ties, and baling wire. I then attached the ends with screws and wire to the underside of the beams in the ceiling. I took each bar and wrapped it in many layers of chicken wire.
I bought several hundred “bird nest fern” silk plants from Michael’s craft store – they were the closest thing I could find that resembled cacao leaves. I wired them onto the tree skeleton much like you would if you were adding feathers to a tied fishing fly (and yes, I also can tie flies). This would give them strength so that I could pull, twist and arrange them the way I liked.
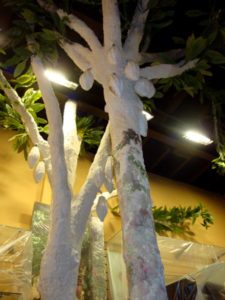
I sacrificed one of my beloved cacao pod molds and used it to create several life-like pods with plaster of Paris. Before the plaster set up completely, I sunk baling wire into it to give a hook to attach it to the tree. I initially tried to make the pods from other materials including papier-mâché, but they were too light and did not hang properly from the tree – they felt fake and awkward. When the cacao pods are ripe on a real tree, they are very heavy with thick rinds like small pumpkins and contain a lot of moisture. It was important to me for the pods to hang properly.
Cacao trees are very funny looking trees. They are cauliflourous – meaning the flowers and fruits sprout directly from the trunk and not the branches like apples or oranges do. For those that haven’t traveled to the tropics, a cacao tree appears very exotic and otherworldly. BTW, the Denver Botanical Garden has a wonderful cacao specimen in their green house! It has flowered and produced fruits for many years now – truly a must-see for all cacao lovers!
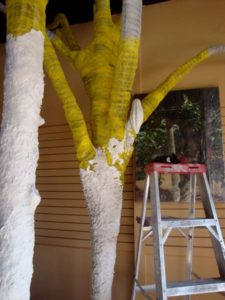
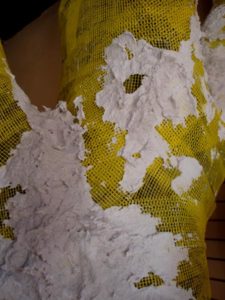
After I attached the heavy plaster pods to the trunk with more baling wire, I wrapped mesh drywall joint tape around and over the chicken wire to give a toothy surface for my papier-mâché to adhere to.
I have used a wonderful craft product for years that I just love! It is called “Celluclay” from Activa, a delightful company in Marshall, Texas (wonderful customer service, too!) Here is their website: www.activaproducts.com/. I will send them a picture of how I use their wonderful product!
What is unique about Celluclay is that it is non-toxic and comes as what appears to be dried ground up newspaper with a paste already mixed in. All you need to do is add water and it mixes into a thick modeling paste – my kids love it, too!!! Working from the bottom up, I slathered the papier-mâché paste onto the skeleton, using my thumbs to create pruned branch stubs and rough bark. After a few days, the mâché was dry enough to paint.
I spent many enjoyable hours on a ladder with Yo-Yo Ma and Anne Sophie Mutter (on my IPOD) building my trees. One of my fondest memories was getting to know some of my neighbors during this construction phase. Many would pop in and say, “Hi!” as I worked. Anna, you all know her as “Ma” of Zoe Ma Ma, would frequently stop in on her way to work and we would chat.
Actually, I haven’t finished painting my trees yet. One of these early mornings, you will catch me and Yo-Yo on the very tall ladder finishing the painting of my trees… before I start my day melting lovely chocolate.
A lot of love went into my space, piece by piece. When you come in to visit, I know that you will feel it, too!

Thank you so much for sharing how you built your tree! I was searching for information to build a ‘tree’ around a pole in our children’s ministry room at our church and found your wonderful explanation! I had an idea about using chicken wire and Plaster of Paris but I was stumped on how to add ‘limbs’. You are so kind to share your info! I’m from Tennessee but if I find my way out to Colorado you can expect a visit from me because I love chocolate too! Thanks again!